- Identity verification: an identity document needs to be scanned and will be analyzed via authenticity controls and will return a score
- Face match: if available, the identity document face will be compared to the video onboarding face and scored. Additional controls are done to detect abnormal face emotions or person of interest (PEP, SIP, …).
- Data verification and information request: the answer will be compared to known information or to pre-defined list of accepted answers.
- Document upload: a document (proof of address for example) needs to be uploaded from our client’s customer device or a picture of the document needs to be taken using the camera.
- Antibot verification: our client’s customer needs to read numbers that appear on the screen, to make sure he/she is not a robot.
Description and definitions
As mentionned above, each finished session is given a score that is computed depending on the scenario configuration. Go!Vid also provides a set of features to review sessions and define their status using labels. These labels can be automatically or manually set. In the following document the merchant will be the integrator of the solution.Session labels
How it works
Any scenario is configured with:- a list of available labels to set once a session ends. Each of these labels can be used by Go!Vid automatically at the end of a session or only manually.
- a session score threshold to determine if the session state is negative, positive or neutral.
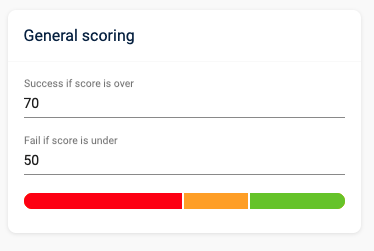
Example
Let’s use this set of labels: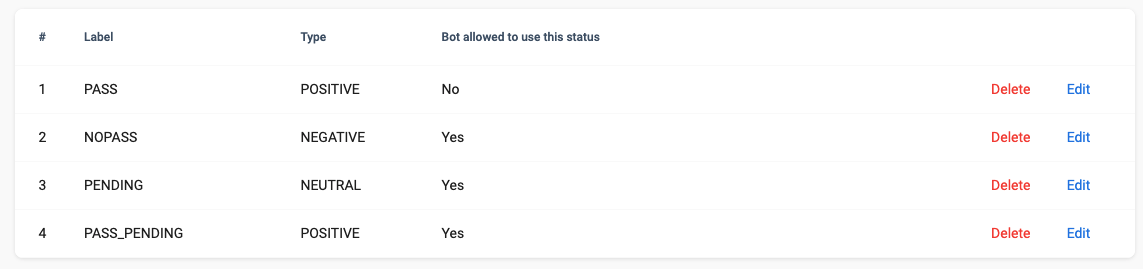
Integration example
See our integration guide for a more complete tutorial.

Onboarding link generation
To generate an onboarding link, you must first define an onboarding scenario and its several translations. Then for each new customer to onboard, you will request an onboarding link using our dedicated endpoint. Depending on the onboarding scenario, you must provide the customer information for the link generation. This information includes: first name, last name, birth date, nationality, address, and phone number. You can also add additional custom data.
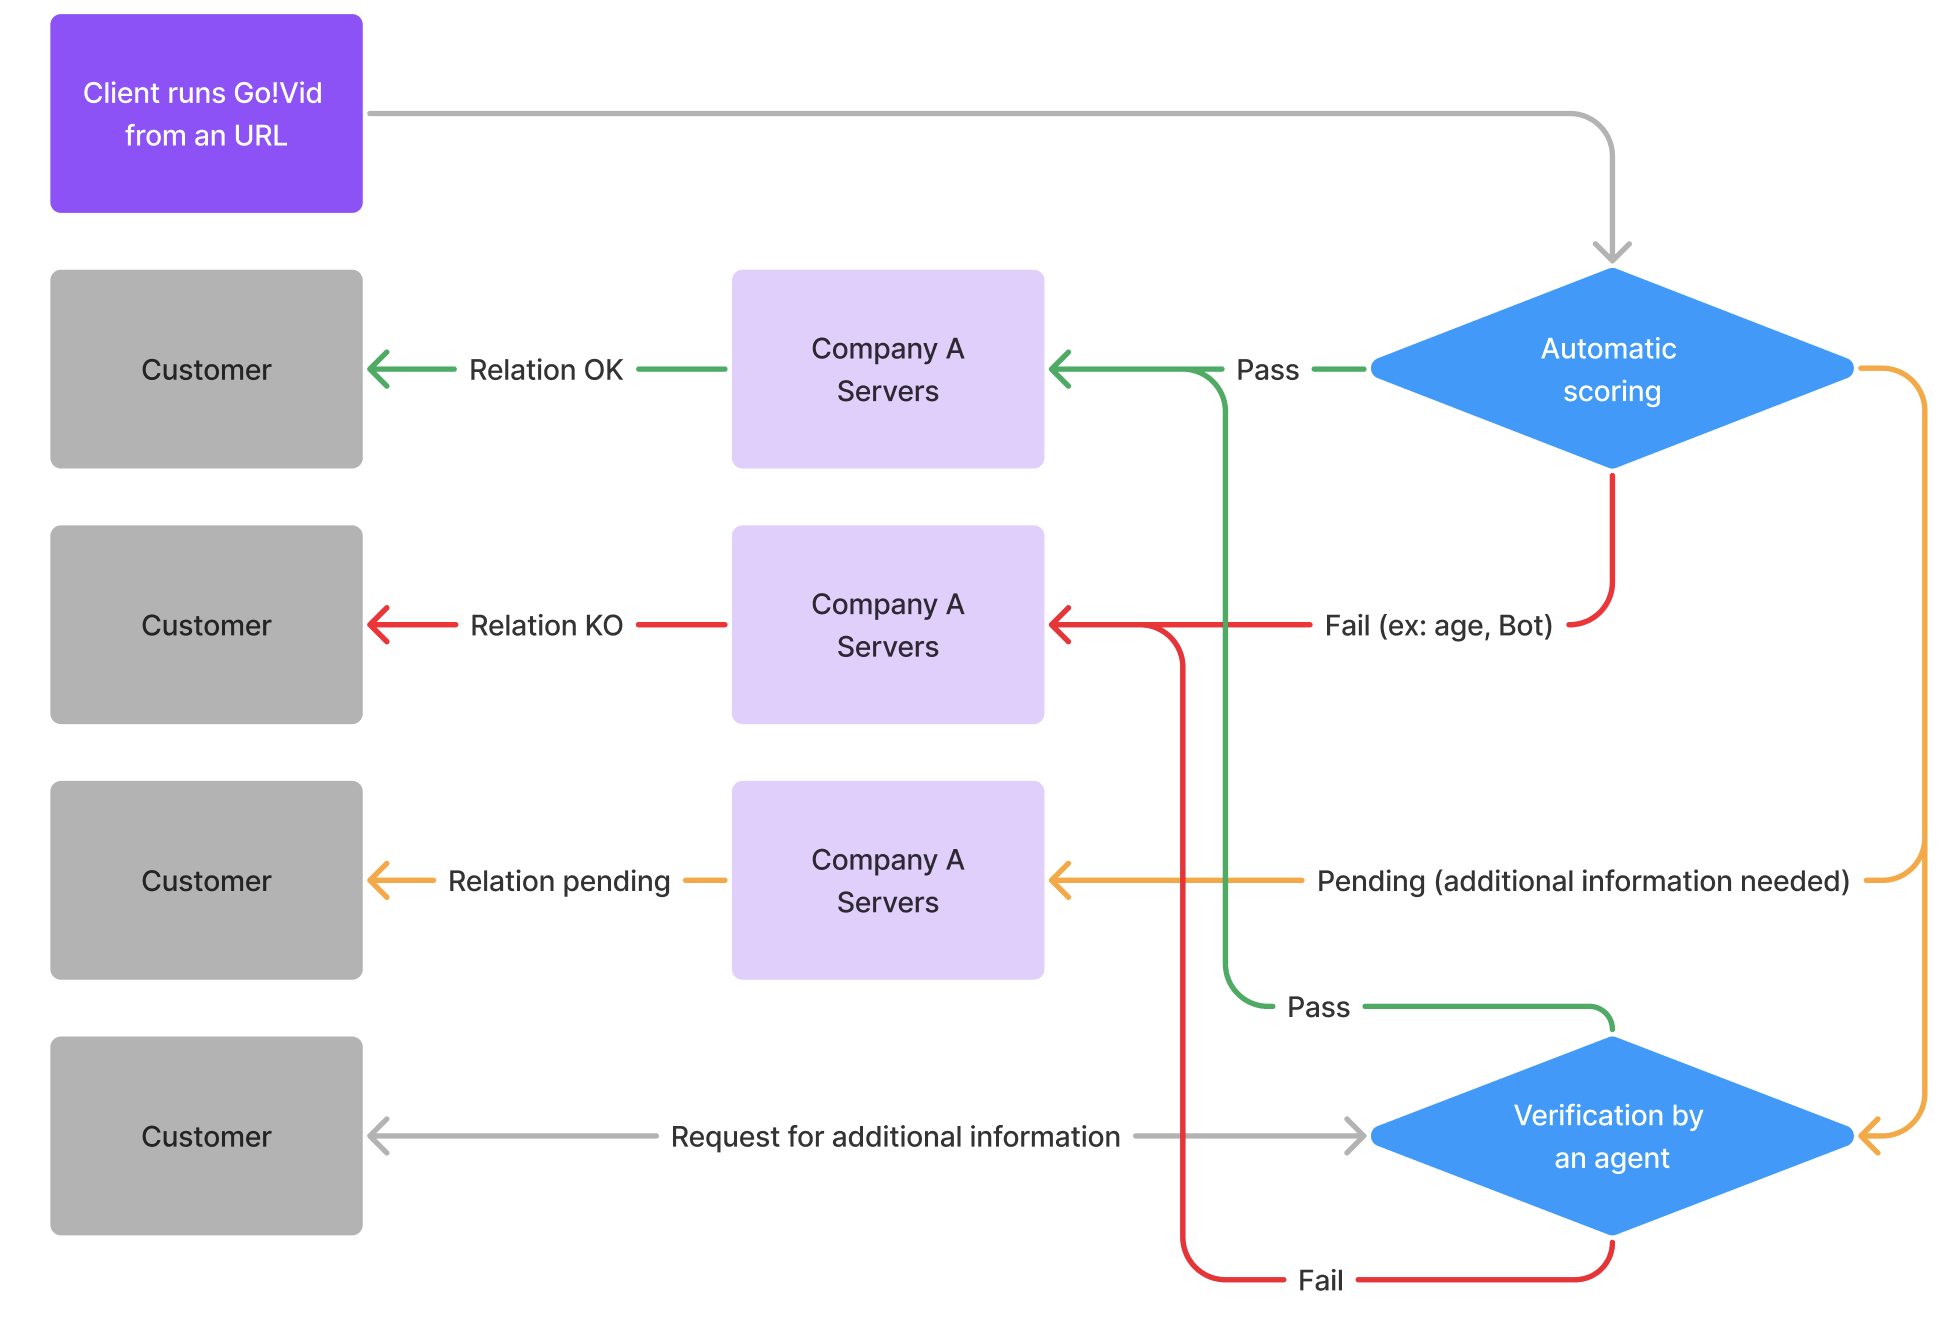
Label change web-hooks flux
In this schema, we emphasis that the label change can come from an automatic scoring or a human verification depending on your setup. As described in the labels section, multiple labels can be defined for each of the categories “POSITIVE”, “NEUTRAL” and “NEGATIVE” (here represented by “Pass”, “Pending” and “Fail”).